Zucchini Rollatini
Ever bitten into a dish so creamy and delicious it feels like a warm hug?
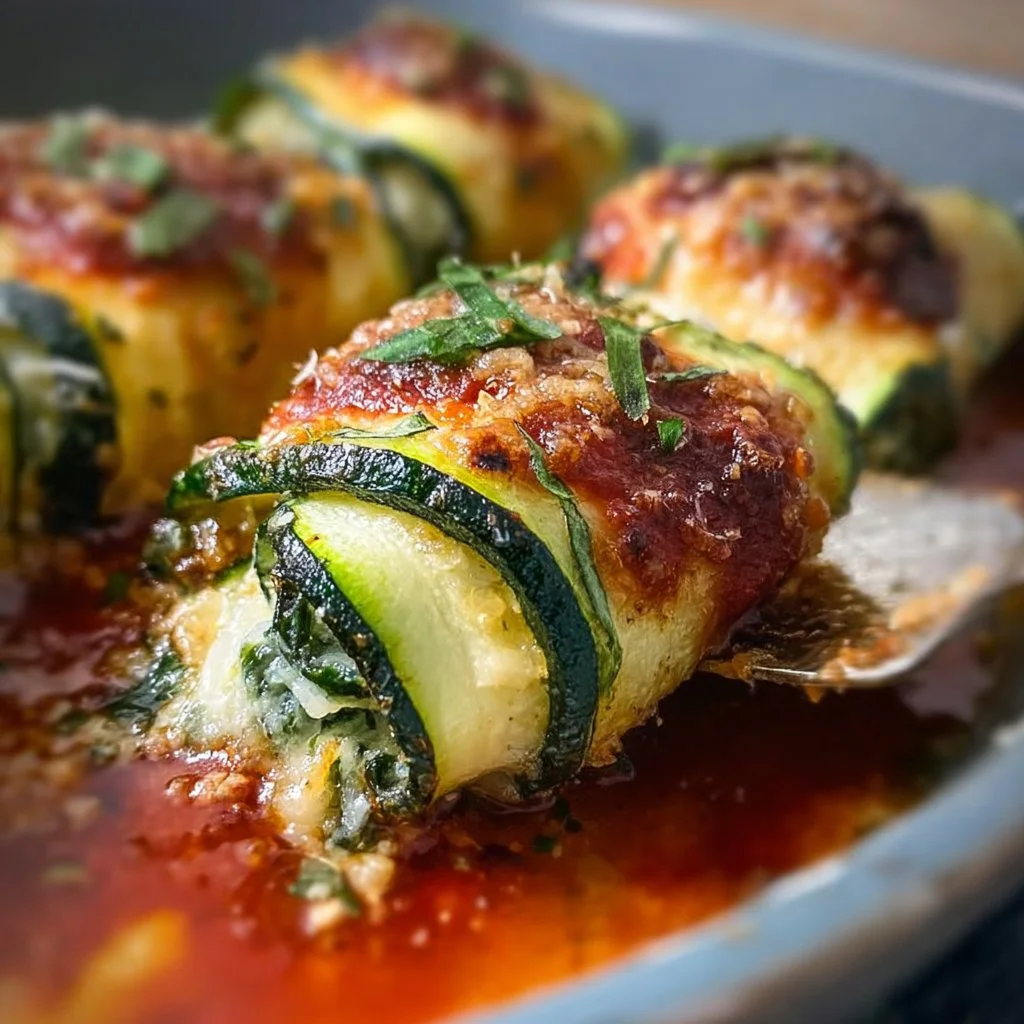
Zucchini Rollatini is just that — a delightful twist on traditional stuffed dishes. With thinly sliced zucchini enveloping a rich cheese filling, you won’t miss the carbs one bit! It’s an ultra-simple way to enjoy the seasonal bounty of summer squash, perfect for a cozy dinner or as an appealing side dish at a gathering.
Why make this recipe
Here’s why you’ll want to keep Zucchini Rollatini in your back pocket:
- Easy cleanup: This dish is baked in one pan, so you can spend less time cleaning up and more time enjoying! 🙌
- Family-friendly: Kids love to help with rolling the strips, and you’ll get a kick out of sneaking in those veggies.
- Affordable: With ingredients you likely have at home, this recipe won’t break the bank.
Ingredients:
You don’t need fancy stuff — just these basics!
- 2 large zucchinis
- 1 cup ricotta cheese
- 1/2 cup grated Parmesan cheese
- 1 cup marinara sauce
- 1 egg
- 1 teaspoon garlic powder
- 1 teaspoon dried oregano
- Salt and pepper to taste
- Fresh basil for garnish
Directions:
- Preheat your oven to 375°F (190°C).
- Slice the zucchinis lengthwise into thin strips using a mandoline or a sharp knife.
- Lightly salt the zucchini strips and let them sit for about 15 minutes to draw out moisture.
- In a bowl, combine ricotta cheese, Parmesan cheese, egg, garlic powder, oregano, salt, and pepper.
- Pat the zucchini strips dry and spread a layer of the cheese filling on each strip.
- Roll up the zucchini strips and place them seam-side down in a baking dish.
- Pour marinara sauce over the rolled zucchini.
- Cover the dish with aluminum foil and bake for 25-30 minutes.
- Remove the foil and bake for an additional 10 minutes until bubbly and golden.
- Garnish with fresh basil and serve.
How to make Zucchini Rollatini (Overview)
Making Zucchini Rollatini is a breeze! Start by slicing those zucchinis into strips and giving them a little salt treatment to release moisture. While that’s doing its thing, mix up your ricotta filling. Once your strips are ready, slather the filling on top, roll them up, and tuck them into a dish with marinara. A little time in the oven, and voilà! Serve hot with some basil, and you’re ready to impress. Pro tip: Don’t skip the salting step — it ensures your rolls don’t turn out soggy.
How to serve Zucchini Rollatini
These zucchini rolls make for an eye-catching presentation on any dinner table. Arrange them on a vibrant plate, drizzle with some extra marinara sauce, and sprinkle with fresh basil. The aroma of baked cheese and simmering sauce fills the air, making your taste buds dance. Serve with a crunchy salad or some toasted garlic bread for a complete meal experience.
How to store Zucchini Rollatini
Got leftovers? Lucky you! Zucchini Rollatini will keep well in the fridge for up to 3 days. Just cover it tightly. If you’re feeling ambitious, you can freeze these rolls before baking for up to 3 months. When ready to enjoy, thaw and bake directly, adding a few extra minutes to cook through.
Tips to make Zucchini Rollatini
- Slice the zucchinis thin: Aim for around 1/8 inch for easy rolling.
- Add spices: Feel free to jazz up the cheese filling with your favorite herbs. Who doesn’t love a little customization?
- Use store-bought marinara: Time-saving and still delicious — don’t stress yourself out over homemade sauce!
Variation
Want to change the flavor game? Try adding some spinach or mushrooms to your ricotta mix for an earthy twist. If you’re feeling adventurous, consider using tofu instead of ricotta for a vegan take!
FAQs
1. Can I make Zucchini Rollatini ahead of time?
Absolutely! Assemble the rolls, cover them tightly, and store in the fridge for up to 24 hours before baking.
2. Can I use other vegetables?
Yes! Eggplant or yellow squash work well too. Just slice them thinly like zucchini.
3. How do I prevent the zucchini from getting soggy?
Salting the strips helps draw out excess moisture before cooking. Don’t skip this step!
📌 Pin this recipe for your next cozy dinner night!
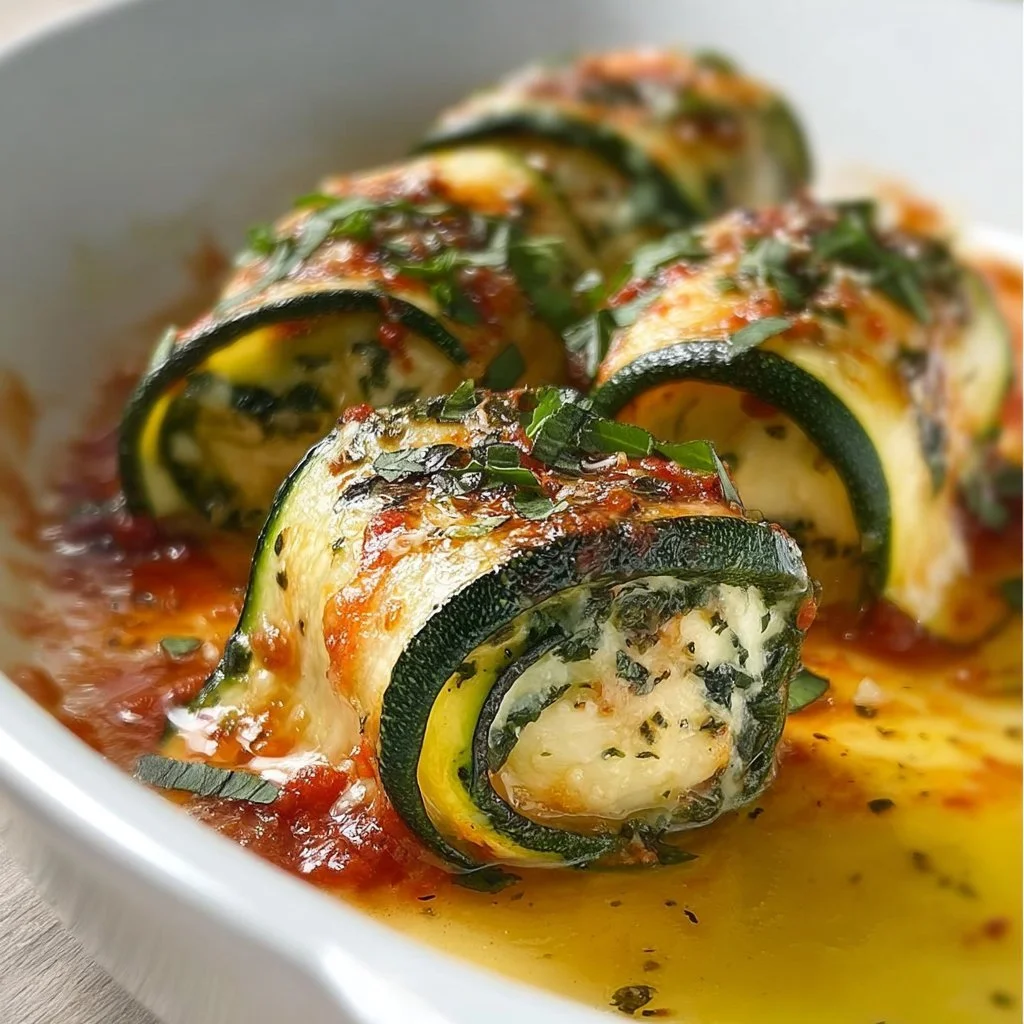
Zucchini Rollatini
Ingredients
Method
- Preheat your oven to 375°F (190°C).
- Slice the zucchinis lengthwise into thin strips using a mandoline or a sharp knife.
- Lightly salt the zucchini strips and let them sit for about 15 minutes to draw out moisture.
- In a bowl, combine ricotta cheese, Parmesan cheese, egg, garlic powder, oregano, salt, and pepper.
- Pat the zucchini strips dry and spread a layer of the cheese filling on each strip.
- Roll up the zucchini strips and place them seam-side down in a baking dish.
- Pour marinara sauce over the rolled zucchini.
- Cover the dish with aluminum foil and bake for 25-30 minutes.
- Remove the foil and bake for an additional 10 minutes until bubbly and golden.
- Garnish with fresh basil and serve.
Notes
Printable Recipe Card
Want just the essential recipe details without scrolling through the article? Get our printable recipe card with just the ingredients and instructions.