Coconut Cream Pie
Craving a dessert that feels like a tropical getaway?
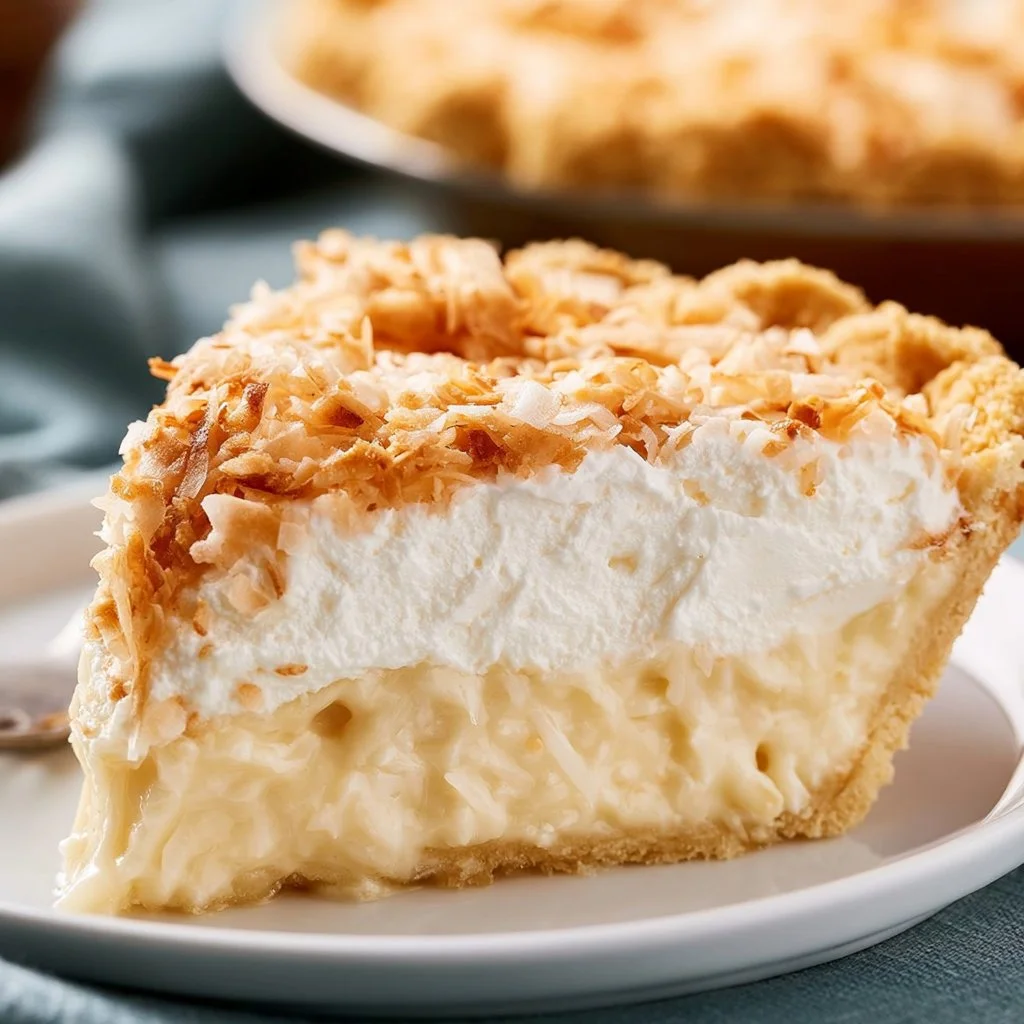
Picture this: a luscious, creamy filling enveloped in a crisp pie crust, topped with fluffy whipped cream and toasted coconut flakes. Coconut Cream Pie is not just a treat; it’s a slice of paradise you can whip up in no time. Whether you’re hosting friends or treating yourself, this pie hits all the right notes. Let’s dive into this easy and delightful recipe that even your non-baking friends will be wowed by!
Why make this recipe
Why bother with complicated desserts when you can have all the creamy goodness in a simple Coconut Cream Pie? First, it’s a one-pan wonder, making cleanup a breeze. And let’s be honest, who doesn’t love saving time in the kitchen? Second, it’s perfectly family-friendly—kids and adults alike will devour it. Plus, with ingredients you probably have on hand, it won’t break the bank.
Ingredients
You don’t need fancy stuff — just these basics!
- 1 pre-made pie crust
- 1 cup coconut milk
- 1 cup heavy cream
- 3/4 cup sugar
- 1/4 cup cornstarch
- 1/2 teaspoon salt
- 1 teaspoon vanilla extract
- 1 cup shredded coconut
- Whipped cream for topping
- Toasted coconut flakes for garnish
Directions
Follow these simple steps for a no-fail dessert:
- Preheat the oven to 350°F (175°C) and bake the pie crust until golden.
- In a saucepan, whisk together sugar, cornstarch, and salt. Gradually add coconut milk and heavy cream, stirring until combined.
- Cook over medium heat, stirring constantly, until the mixture thickens and comes to a boil.
- Remove from heat and stir in vanilla extract and shredded coconut.
- Pour the filling into the baked pie crust and let it cool.
- Refrigerate for several hours until set.
- Top with whipped cream and sprinkle toasted coconut flakes before serving.

How to make Coconut Cream Pie (Overview)
Making Coconut Cream Pie is simpler than you might think! First, you create the delicious filling by blending creamy coconut and heavy cream with sugar and cornstarch. Remember to keep stirring until it thickens—nobody likes a lumpy pie! Pour it into your baked pie crust, let it cool, and then chill in the fridge. Top it off with whipped cream and toasted coconut for that perfect finishing touch. Pro tip: Don’t skip toasting the coconut; it adds a nutty flavor that’s absolutely divine!
How to serve Coconut Cream Pie
Serve this pie chilled for a refreshing treat! Slice into it to reveal that creamy, dreamy filling and watch as the whipped cream clouds float on top. Drizzle a little chocolate syrup or a splash of rum sauce for an extra indulgent experience. Imagine the aroma of toasted coconut wafting through your kitchen—now that’s a vibe!
How to store Coconut Cream Pie
If you find yourself with leftovers (which is unlikely!), store the pie in the fridge, where it will keep for up to 3-4 days. Just remember, if you want to save it for later, don’t add the whipped cream until you’re ready to serve. Freezing it? You can—just keep it wrapped tightly and thaw it overnight in the refrigerator.
Tips to make Coconut Cream Pie
- Don’t rush the cooling: Letting the filling set in the fridge makes all the difference in texture.
- Substitute light coconut milk for a lower-fat option, but don’t skimp on the heavy cream—it’s where the magic happens.
- For a twist, add a dash of almond extract for a unique flavor profile that pairs beautifully with coconut.
- Experiment with different crusts—cookies or graham crackers can bring a fun crunch.
Variation
Want to mix it up? Try making a vegan version using coconut cream or silken tofu instead of heavy cream. You can also play with flavors by adding pineapple or mango for a tropical flair!
FAQs
Can I make this pie ahead of time?
Absolutely! You can prepare this pie a day in advance. Just keep it in the fridge until serving.
How do I prevent the filling from being lumpy?
Make sure to continuously whisk the mixture as it heats up—this will help it come together smoothly.
Can I freeze Coconut Cream Pie?
Yes! Just make sure to wrap it well, and remember to add the whipped cream fresh before serving for best results.
📌 Pin this recipe for your next cozy dinner night!
Coconut Cream Pie
Ingredients
Method
- Preheat the oven to 350°F (175°C) and bake the pie crust until golden.
- In a saucepan, whisk together sugar, cornstarch, and salt. Gradually add coconut milk and heavy cream, stirring until combined.
- Cook over medium heat, stirring constantly, until the mixture thickens and comes to a boil.
- Remove from heat and stir in vanilla extract and shredded coconut.
- Pour the filling into the baked pie crust and let it cool.
- Refrigerate for several hours until set.
- Top with whipped cream and sprinkle with toasted coconut flakes before serving.
Notes
Printable Recipe Card
Want just the essential recipe details without scrolling through the article? Get our printable recipe card with just the ingredients and instructions.