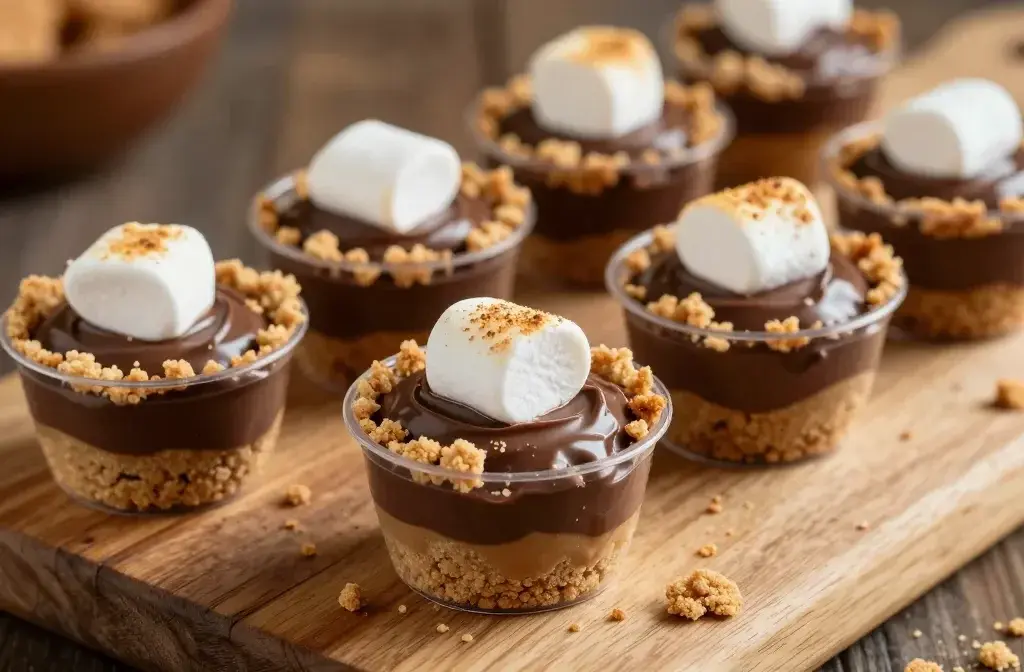
No-Bake S’Mores Dessert Cups: Easy, No-Oun Heat? Not Needed
It’s dessert time, but no oven required. These No-Bake S’mores Dessert Cups come together faster than you can say “campfire vibes.” Rich chocolate, toasty marshmallow, and a crumbly graham crust—without heating up the kitchen. Ready to dive in? Let’s go.
Why These Cups Are Obsessed–worthy
If you’ve ever wished for a s’more that’s easy to share and repeatable, you’re in luck. These cups take all the best parts of a campfire treat and shove them into tiny, portable delights. They’re perfect for potlucks, sleepovers, or a weeknight dessert that feels fancy but basks in simplicity.
– No baking needed
– Make-ahead friendly
– Customizable with mix-ins
– Kid-friendly, too (with supervision around chocolate)
Want the quick pitch? They look like fancy desserts, but they act like no-fuss snacks. FYI, that contrast is exactly what makes them addictive.
What You’ll Need: Ingredients at a Glance
Here’s the lay of the land. You’ll see how easy it is to pull this off with pantry staples.
– Crust: crushed graham crackers, melted butter, a pinch of sugar
– Creamy layer: whipped cream or cream cheese yogurt for tang
– Chocolate: chocolate chips or melted bars
– Marshmallow: mini marshmallows or mallows chopped
– Optional twists: peanut butter, caramel drizzle, sea salt, espresso powder, or a dash of cinnamon
Why these ingredients? The textures dance between crunchy, creamy, and chewy. And yes, you can swap in what you’ve got—this is dessert democracy, people.
Step-by-Step Assembly: From Start to Finish

A smooth assembly makes these cups a breeze. Follow along and you’ll be sipping hot cocoa with a minty grin in no time.
Step 1: Crush and Crunch the Crust
– Crush graham crackers until they resemble wet sand. If you like bigger crunch, leave a few coarser bits in.
– Mix with melted butter and a pinch of sugar.
– Spoon into lined muffin tins and press down firmly. You want a compact, cookie-donut feel, not a crumb avalanche.
Step 2: Create the Creamy Layer
– Whip cream with a touch of vanilla, or whip cream cheese with a whisper of powdered sugar for extra tang.
– Dollop or pipe a layer right on top of the crust. Keep it even and not too thick—these are bite-sized, after all.
Step 3: Chocolate Time
– Melt chocolate gently (double boiler or microwave in short bursts). Stir until glossy.
– Pour a thin layer over the creamy part, just enough to see a little shine when you peek at the cups.
Step 4: Marshmallow Magic
– Top with mini marshmallows, or scatter half-topped mini mallows for a toasty look after you broil.
– If you’re using the broiler to toast, watch like a hawk; those little guys go from “golden” to “charcoal” in seconds.
Step 5: Chill and Shine
– Chill for at least 1–2 hours, or overnight if you’re prepping ahead.
– Optional finishing touch: a light crack of sea salt, a drizzle of caramel, or a sprinkle of crushed graham for drama.
Flavor Play: Fun Variations to Try
Bored of the classic combo? Here are some playful spins to keep things exciting.
Peanut Butter Dream
– Add a dollop of peanut butter between the crust and cream layer.
– Drizzle melted chocolate with a quick swirl of peanut butter on top.
Caramel Sea Salt Twist
– Stir caramel into the cream layer.
– Finish with a pinch of flaky sea salt and a caramel drizzle.
Mocha S’mores
– Add a teaspoon of instant espresso to the chocolate.
– Top with cocoa powder dust or coffee sugar for a cafe vibe.
Fruit-Fresh Version
– Mix in a layer of strawberry or raspberry jam between the cream and chocolate.
– Garnish with a fresh berry for color and a tart pop.
Make-Ahead Magic and Storage Tips
These cups love planning ahead. They’re basically the gift that keeps giving on party day.
– Make ahead: Assemble crust and cream layers a day in advance, refrigerate. Add chocolate and marshmallows right before serving if you like the top pristine.
– Freezing: Not ideal for the marshmallow top, but you can freeze unassembled components. Thaw and assemble when ready to serve.
– Storing: Keep in an airtight container in the fridge for up to 4 days. If you’re stacking, place parchment between layers to dodge squashed tops.
Presentation: Turning Cups into Show-Stoppers
Little cups deserve big personality. Here’s how to make them Instagram-worthy without burning yourself out.
– Use bright liners or parchment cups to avoid dull dryness.
– Garnish with playful toppers: a tiny roasted marshmallow, chocolate curls, or a sugar-glass sunburst.
– Serve on a cute tray with mini spoons. The little details matter.
Tips and Tricks for S’mores Perfection
Shortcuts and pro ideas to save time and boost flavor.
– Use room-temperature cream for smoother layering.
– If you don’t have a piping bag, a plastic freezer bag with a snip works in a pinch.
– Want ultra-smooth chocolate? Temp it briefly after melting to avoid streaks.
– For a lighter feel, swap whipped cream for a stabilized whipped topping.
Texture Talk: Crunch vs Cream
– The crust gives crunch, the cream adds softness, and the chocolate-wrapped top seals the deal. If you want extra chew, add a few mini marshmallows in the cream layer.
Flavor Balance: Sweetness Control
– If your chocolate is very sweet, cut back on sugar in the crust and cream. A little tang goes a long way to balance everything out. IMO, a pinch of salt can also lift the flavor.
FAQ
Can I use regular marshmallows instead of mini ones?
Yes, but cut them into smaller pieces so they melt and spread evenly. Mini mallows blend better with the layers and look cute on top.
Do I have to chill these cups, or can I serve them right away?
Chilling helps the layers set and makes them easy to grab. If you’re in a rush, you can chill for 30–45 minutes, but they won’t slice as neatly.
Can I make these dairy-free?
Absolutely. Use dairy-free butter, coconut cream or whipped coconut cream, and dairy-free chocolate. Just note the texture may vary slightly.
What substitutions work well for the crust?
Crushed graham crackers are classic, but you can swap in digestive biscuits, crushed cookies, or even a mixture with a bit of crushed pretzels for a salty crunch.
How do I prevent the cups from leaking chocolate or cream?
Line muffin tins with sturdy liners and don’t overfill. Keep the chocolate layer thin and chill before adding the final marshmallow top to help everything set firmly.
Conclusion: Your No-Bake S’mores Moment
There you have it: no-bake No-Bake S’mores Dessert Cups that feel premium without requiring a full-on kitchen bake-a-thon. They’re playful, crowd-pleasing, and surprisingly adaptable. FYI, you’ll probably end up making them again and again—because once you taste that glossy chocolate, creamy center, and toasty marshmallow crown, you’ll understand the hype.
So grab your ingredients, line up those cups, and get ready to serve a dessert that’s part campfire nostalgia, part modern snack hack. If you’re feeling extra, snap a pic for the ’gram and tag me in your tray of little bites. These cups aren’t just desserts; they’re tiny celebrations in every bite. Enjoy!