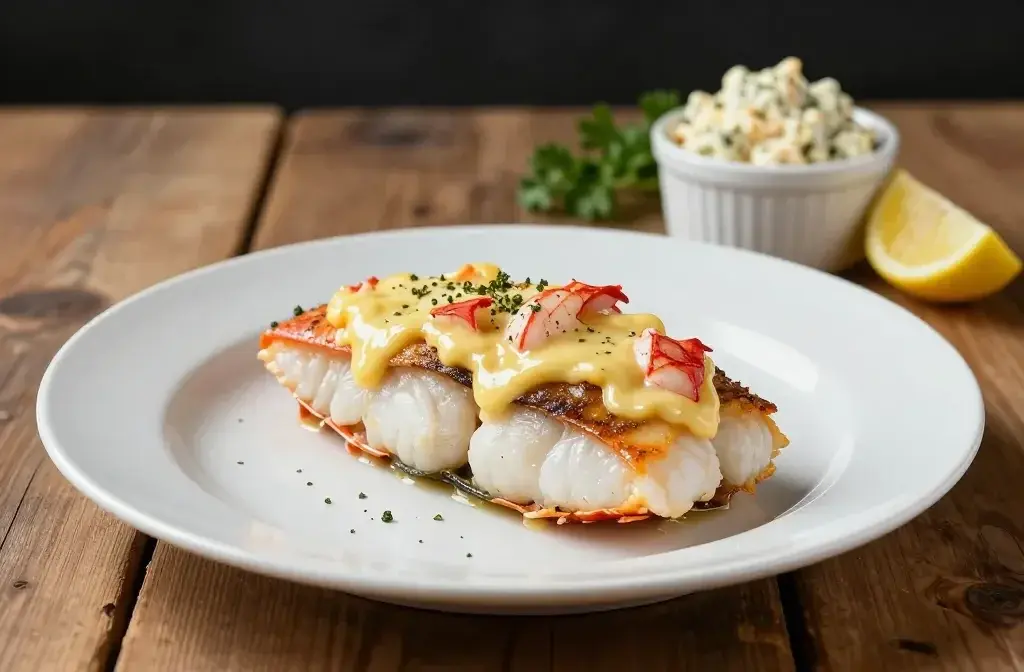
Lobster-Stuffed Tilapia Bake: Elegant Weeknight Win
The idea of tossing lobster into a tilapia bake might sound audacious, but it’s pure dinner magic. You get the delicate, flaky fish with a rich, buttery lobster kiss on top. It’s fancy enough for guests, simple enough for a weeknight, and surprisingly forgiving to cook.
Let’s break it down and get you from “what’s for dinner?” to “this is amazing.” FYI, you’re about to impress yourself.
Why Lobster-Stuffed Tilapia? The quick pitch
Tilapia is dependable: mild, quick to cook, and forgiving if you overcook it a touch. Lobster, on the other hand, brings luxury without needing a TV studio kitchen. When you combine them, you get a dish that feels elevated but stays approachable.
– The flavors play well together: sweet seafood meets creamy, garlicky stuffing.
– It bakes fast, so you don’t spend all night in the kitchen.
– You can customize the stuffing to suit your pantry and budget.
If you’re grilling or sautéing, you’ll miss out on that baked, bubbly topping that turns a simple bake into a party plate. So bake it, then take a bow.
The star players: what you’ll need
Here’s your grocery list in crisp, no-fuss terms. Keep it simple, but don’t skimp on flavor.
– Tilapia fillets: 4 portions, about 6 ounces each
– Lobster meat: 1 cup (pre-cooked is fine)
– Breadcrumbs: 3/4 cup
– Butter: 3 tablespoons
– Garlic: 2 cloves, minced
– Shallot or green onion: 1 small, finely chopped
– Cream cheese or mayo: 2 tablespoons (optional for extra creaminess)
– Fresh herbs: parsley or chives, chopped
– Lemon: 1, zested and juiced
– Salt and pepper: to taste
– Optional dairy lift: a splash of white wine or cream
– Toppings: a pinch of paprika or Old Bay for a little zing
If you’re feeling fancy, you can add finely chopped spinach or sun-dried tomatoes for extra dimension. If you’re aiming for budget-friendly, you can swap in more breadcrumbs and a splash of milk instead of cream.
Prepping the filling: bright, indulgent, no-fuss

The filling is where the magic hides. It should feel luxe but still doable in real life.
– Sauté aromatics: Melt butter, soften garlic and shallot until they smell like you’re about to cook an epic meal.
– Build the base: Stir in breadcrumbs until they soak up the butter. If you want a leaner texture, use less butter or drizzle a bit of olive oil.
– Creamily-upgrade: Fold in cream cheese or mayo for that dreamy bite. Add lemon juice, zest, and chopped herbs.
– Lobster love: Gently fold in your lobster meat. You don’t want to shred it; you want little lobster bites throughout the filling.
– Seasoning: Salt, pepper, and a light pinch of paprika or Old Bay give the filling personality without overpowering the fish.
Pro tip: don’t overmix. You want a cohesive filling, not a paste. Also, keep a bit of texture and bite in the lobster chunks.
Stuffing the tilapia: how to avoid a soggy bake
This is where technique matters. You want the fish to stay moist, not sit in a puddle of liquid.
– Dry the fillets: Pat them dry with paper towels. Moisture is the enemy of a crisp topping.
– Season the fish: A light sprinkle of salt and pepper on the fish itself helps build flavor edge.
– Spread and stuff: Place a small dollop of filling in the center of each fillet. Gently fold or roll if you’re feeling confident. Don’t overfill; you want a neat, tidy roll or pocket.
– Arrange: Put the stuffed fillets in a lightly greased baking dish. If you have extra filling, spoon it around the fish for a generous bed of flavor.
Why roll? It seals flavor inside and prevents the filling from leaking out during baking. Plus, it looks impressive when it comes out of the oven.
Baking like a pro: timing, temperature, and finish
Here’s the lowdown on getting that perfect bake without turning the fish into pellets.
– Temperature: Preheat to 400°F (200°C). High enough to set the topping and finish the fish without drying it.
– Bake time: 12-15 minutes for 6-ounce fillets, longer if they’re thicker. You’re aiming for opaque fish and a bubbly, golden crust on top.
– Check for doneness: If you gently flake the fish with a fork and it’s opaque through, you’re good. The filling should be hot and slightly browned on top.
– Resting: Give it 3-5 minutes to rest. Resting helps the juices redistribute and keeps the fish moist.
– Finish with a zing: A squeeze of lemon over the top right before serving brightens everything up. IMO, a little extra chopped parsley doesn’t hurt either.
If you want a more dramatic finish, switch on the broiler for 1-2 minutes at the end. Watch it like a hawk, though—burnt breadcrumbs are not a vibe.
Serving ideas: what to pair with this showstopper
A dish this flavorful deserves sides that don’t compete. Think fresh, bright, and simple.
– Green veggies: Steamed asparagus, roasted broccoli, or a crisp cucumber salad add balance.
– Carbs that don’t steal the show: Rice pilaf, garlic mashed potatoes, or a light quinoa salad.
– A citrusy caper twist: A quick lemon-butter drizzle with capers over the plate lifts the whole dish.
– Fancy-but-effortless appendages: A dollop of herb yogurt or a simple avocado crema can turn the plate into a restaurant-worthy presentation.
Ask yourself: do you want color, crunch, or a bit of both? You can get all three with roasted cherry tomatoes or a quick slaw.
Variants and quick swaps: keeping it flexible
If you don’t have everything on hand, there are easy substitutes that still taste incredible.
– Protein swap: White fish like cod or halibut works, but tilapia keeps the budget friendly. If you’re feeling extra, try lobster tail chunks instead of canned meat.
– Dairy-free version: Use olive oil in place of butter, and dairy-free cream cheese or a dairy-free mayo alternative.
– Spice it up: Swap paprika for chili flakes or add a pinch of cayenne for heat.
– Veggie boost: Fold in chopped spinach or artichoke hearts for a greener, richer filling.
Remember, you’re cooking for yourself first. If a tweak makes you happier in the moment, roll with it.
FAQ
Can I assemble this ahead of time?
Yes. You can mix the filling ahead and stuff the fillets right before baking. Keep the assembled dish covered in the fridge for up to 24 hours. Add a few extra minutes to the bake time if it’s cold from the fridge.
What if my lobster is pre-cooked and frozen?
Thaw fully and pat dry. Frozen lobster can release extra moisture, so give it a quick check and patience to keep the texture firm.
Is tilapia a good match for this, or should I use another fish?
Tilapia is the easiest, but cod, halibut, or snapper can elevate the dish even more. The key is to keep the fillets from overcooking and to let the lobster shine.
How do I avoid a dry fillet?
Keep the baking time precise, use a little fat in the filling, and avoid overcooking the fish. If you’re worried, use a meat thermometer—target 130-135°F (54-57°C) for flaky, juicy tilapia.
Can I make this dairy-free?
Absolutely. Replace butter with olive oil, and use dairy-free cream cheese or mayo. The topping will be a touch lighter, but still delightfully flavorful.
Does the topping need breadcrumbs?
Breadcrumbs add crunch and a golden crust, but you can skip them or use crushed crackers, panko, or finely chopped nuts for a different texture.
Conclusion
Lobster-Stuffed Tilapia Bake is the kind of dish that makes you feel like you’ve leveled up without signing a cookbook deal. It’s indulgent, but not indulgent to the point of guilt—just enough luxury to feel special. With a bright lemon kick, creamy lobster pockets, and a toasty crust, you’ve got a dinner that’s equal parts comfort and wow.
If you’ve got a hungry crew and a craving for something fancy-but-doable, this bake is your new go-to. IMO, you’ll want to make it again next week. So go ahead—preheat, stuff, bake, and bask in the oohs and ahhs. You’ve earned it.