Decorated Easter Sugar Cookies with Spring Flowers: Delightful Edible Blooms
The kitchen fills with a sweet, sunny scent as soon as you crack open the sugar. Easter is knocking, and these decorated sugar cookies are ready to answer with color, whimsy, and a little bit of whimsy. If you’ve ever wondered how to make cookies that taste as cheerful as spring looks, you’re in the right place. Let’s dive in, shall we?
Why Decorated Easter Sugar Cookies Win the Spring Game
Spring is all about blooms, bright mornings, and not taking life too seriously. Decorated sugar cookies capture that vibe in edible form—no fancy equipment required, just color, patience, and a sprinkle of creativity. They’re perfect for gifting, party spread-starters, or a relaxing baking afternoon with the kids. FYI, they also double as pretty table decor if you’re into edible centerpieces.
Getting the Right Cookie Base: The Perfect Sugar Cookie
A great decorated cookie starts with a solid base, so you don’t end up chasing a crumbling disaster.
- Ingredients you actually like: butter, sugar, vanilla, flour, and salt. Simple, right?
- Texture matters: roll dough 1/4 inch thick for a snap, or a touch thicker for a softer bite.
- Chill for control: chilling helps hold shapes during baking and makes icing easier to work with.
Tips for the best-cut cookies
- Chill dough between cuts to prevent spreading.
- Dip cookie cutters in flour or lightly dust with cornstarch to prevent sticking.
- Use parchment on the baking sheet for easy lifting and clean edges.
Icing 101: Royal Icing vs. Flood Icing

If you’re new to decorating, the icing is where the magic happens. Two stars in the sugar-cookie sky are royal icing and flood icing. They’re friends, not frenemies, and they each have a vibe.
Royal icing: the classic canvas
Royal icing dries hard and smooth, perfect for outlines and precise details. It’s like the duct tape of cookie decorating—versatile and reliable. Mix it with a touch of lemon juice or vanilla to prevent that tacky sweetness some folks hate.
Flood icing: the color-block superstar
Flood icing is your friend for pouring into outlined areas and creating even surfaces. It dries with a satin finish and gives you room to add delicate details on top. Pro tip: tint early and keep the consistency slightly thicker than pancake batter for clean edges.
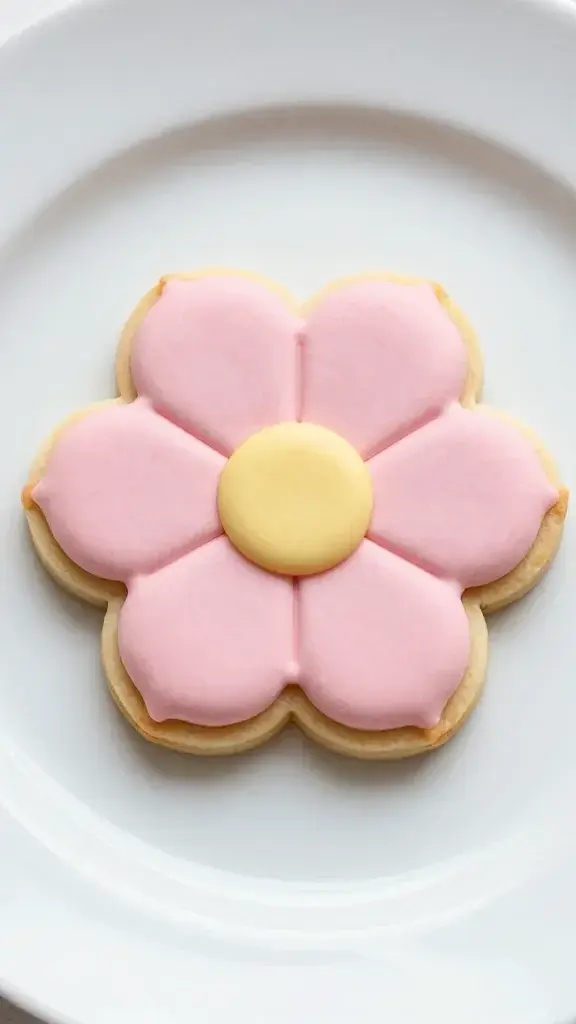
Spring Flower Motifs: Easy Designs That Look Like Spring Vomited Sunshine
You don’t need to be a pro florist to pull off spring florals on cookies. Here are approachable ideas that still feel fancy.
- Simple daisy petals: small white circles with yellow centers and five to six tiny petals around them. They look adorable and cheerful.
- Chalkboard garden: a green base with white outlines of leaves and tiny blossoms. Retro-cute and easy to customize with pastel colors.
- Tulip toppers: teardrop shapes in pink, red, or orange with a touch of green for the stems. Add a leaf accent for depth.
Color tips that won’t overwhelm
- Use a limited palette—three core colors plus white and black for depth.
- Mix in pastel shades for a true spring feel, but don’t overdo it.
- Keep a small brush handy for delicate lines and tiny leaves.
Decoration Techniques: From Outlines to Whimsy
Here’s a quick playbook for decorating without turning it into a stress test.
- Outline the cookie with royal icing to seal the edge and prevent flooding from bleeding.
- Flood the interior with a slightly thinner icing and let it dry before adding details.
- Add details with a thinner line or a dotting technique for texture.
- Let the cookies dry completely before stacking or packaging.
Tools worth having
- Piping bags, small round tips (like #2 or #3) for fine lines
- A damp brush for softening outlines when you want a watercolor look
- Food-safe markers for tiny details after icing sets
The Assembly Line: Step-by-Step Quick Guide
If you’re a “follow the steps” kind of baker, this flow will keep you on track without losing your mind.
- Make the cookies and let them cool completely.
- Prepare royal icing in a few colors; keep one white for base if you’re flooding.
- Outline each cookie where needed, then flood the interior. Let it dry fully.
- Add spring flowers with a smaller tip; let those details set.
- Finish with a light dusting of edible shimmer if you’re feeling fancy.
Storage, Freshness, and Making It Last
Decorated cookies aren’t forever, but you can stretch their life a bit.
- Keep dry: store in an airtight container away from direct sunlight. Humidity is the sneaky villain.
- Line the layers: place parchment between cookies to avoid sticking and smudging.
- Freeze for later: stack with parchment and seal well. Thaw at room temperature for best texture.
Party-Ready Ideas: How to Turn Cookies into a Spring Tablescape
Cookies aren’t just for eating; they can be decor, too. Here are fun ways to level up your gathering.
- Arrange a cookie bouquet in a tall vase with tissue paper for a centerpiece that’s edible and adorable.
- Lay a row of cookies on a serving board as a colorful backdrop for a dessert spread.
- Create mini “gift boxes” by tying cookies with ribbons—perfect for hostess gifts.
DIY packaging tips
- Wrap cookies in cellophane with a cute label.
- Add a tiny tag with a joke or spring quote to keep things light.
- Use pastel twine or washi tape to finish the look.
FAQ: All the Little Questions You Didn’t Ask But Probably Wanted to
Can I decorate these cookies without royal icing?
Yes, you can use buttercream icing for decoration, but it won’t set as hard as royal icing. For a soft, teddy-bear vibe, buttercream works great. If you want sharp edges and long-lasting designs, stick with royal icing for the main work and use buttercream for accents.
What if my icing colors bleed or run?
Chill the cookies between color applications, and flood with a slightly thicker icing for the base. A tiny bit of corn syrup in your icing helps with gloss and minimizes bleeding. If accidents happen, a thin layer of white can be built over the mess to fix it—think of it as frosting camouflage.
How long do decorated cookies stay fresh?
Typically, 3–7 days at room temperature in a sealed container. If you’re feeding a crowd, bake in advance and freeze before decorating, then decorate after thawing to keep color bright and edges crisp.
Can I make these ahead for Easter baskets?
Absolutely. Bake, freeze, and decorate closer to the event. If you’re pressed for time, decorate in stages: bake and cool, freeze plain cookies, decorate in a separate session, then package.
Any quick shortcuts for beginners?
Yes: use a pre-made royal icing mix or a store-bought royal icing, then add your color work. Practice on a few test cookies first, and don’t fear the wipe-and-restart moment. FYI, practice makes a not-too-bad spring memory.
Conclusion: A Little Sweetness Goes a Long Way
Decorated Easter sugar cookies with spring flowers prove you don’t need a fancy studio to make something heartwarmingly pretty. You just need a little time, a splash of color, and a willingness to embrace tiny imperfect petals. So bake, frost, and share the joy. IMO, nothing says spring like a plate full of cookies that look as bright as a sunny morning and taste like a little celebration. Ready to start your floral cookie adventure? Grab your icing bags and let the colors bloom.