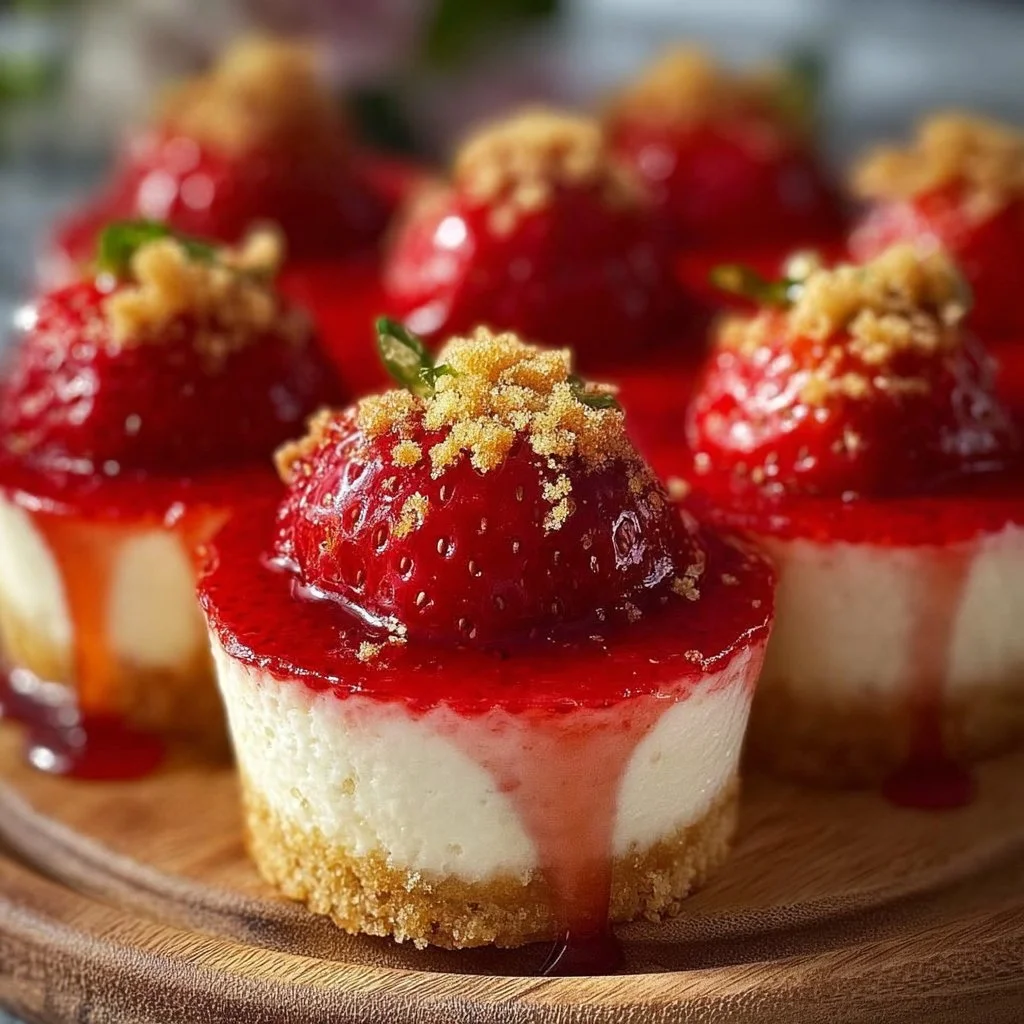
Cheesecake Deviled Strawberries
Dive into Decadence with Cheesecake Deviled Strawberries!
Imagine biting into a plump, juicy strawberry, only to find it stuffed with a creamy cheesecake filling that’s as delightful as it sounds. Cheesecake Deviled Strawberries are not just a dessert; they’re an irresistible treat that turns a simple fruit into a gourmet experience. Perfect for parties or a sweet snack at home, these strawberries will have you dreaming of warmer days and picnics in the park. 🍓
Why Make This Recipe
Here’s why you’ll love them:
- Easy Peasy: Who doesn’t love a dessert that’s both impressive and simple? All you need is a handful of ingredients and a little love.
- Zero Cleanup Drama: Forget about messy pots and pans — all the action happens in your mixing bowl and fridge.
- Crowd-Pleaser: These strawberries are visually stunning and taste even better, making them a fantastic addition to parties or potlucks. Everyone will want the recipe, and you can just smile and nod! 😉
Ingredients
You don’t need fancy stuff — just these basics!
- 3 lbs large fresh strawberries
- 8 oz cream cheese, softened
- 1 cup powdered sugar
- 1 tsp vanilla extract
- 1 ½ cups heavy whipping cream, cold
- ¼ cup graham cracker crumbs
Directions
- Prepare the strawberries: Slice each strawberry lengthwise, keeping the stems intact. Cut a tiny slice off the bottom of each half for stability and hollow out the center.
- Make the filling: Whip the cold heavy cream until stiff peaks form. In a separate bowl, beat the cream cheese, powdered sugar, and vanilla until smooth, then fold in the whipped cream.
- Assemble the strawberries: Fill a piping bag with the cheesecake filling and pipe generously into each strawberry half.
- Add the finishing touch: Sprinkle graham cracker crumbs over each filled strawberry for that authentic cheesecake touch.
- Chill and serve: Refrigerate for at least 1 hour to let the flavors meld and serve chilled!
How to Make Cheesecake Deviled Strawberries (Overview)
Making Cheesecake Deviled Strawberries is a breeze! First, slice and hollow out your strawberries like you’re prepping for sweet little boats. Whip up that luscious filling by mixing cream cheese, sugar, and cream until it’s airy and dreamy. Then, pipe that delightful mixture back into the strawberries like a pro pastry chef. Pro tip: Use a star tip on your piping bag for extra flair!
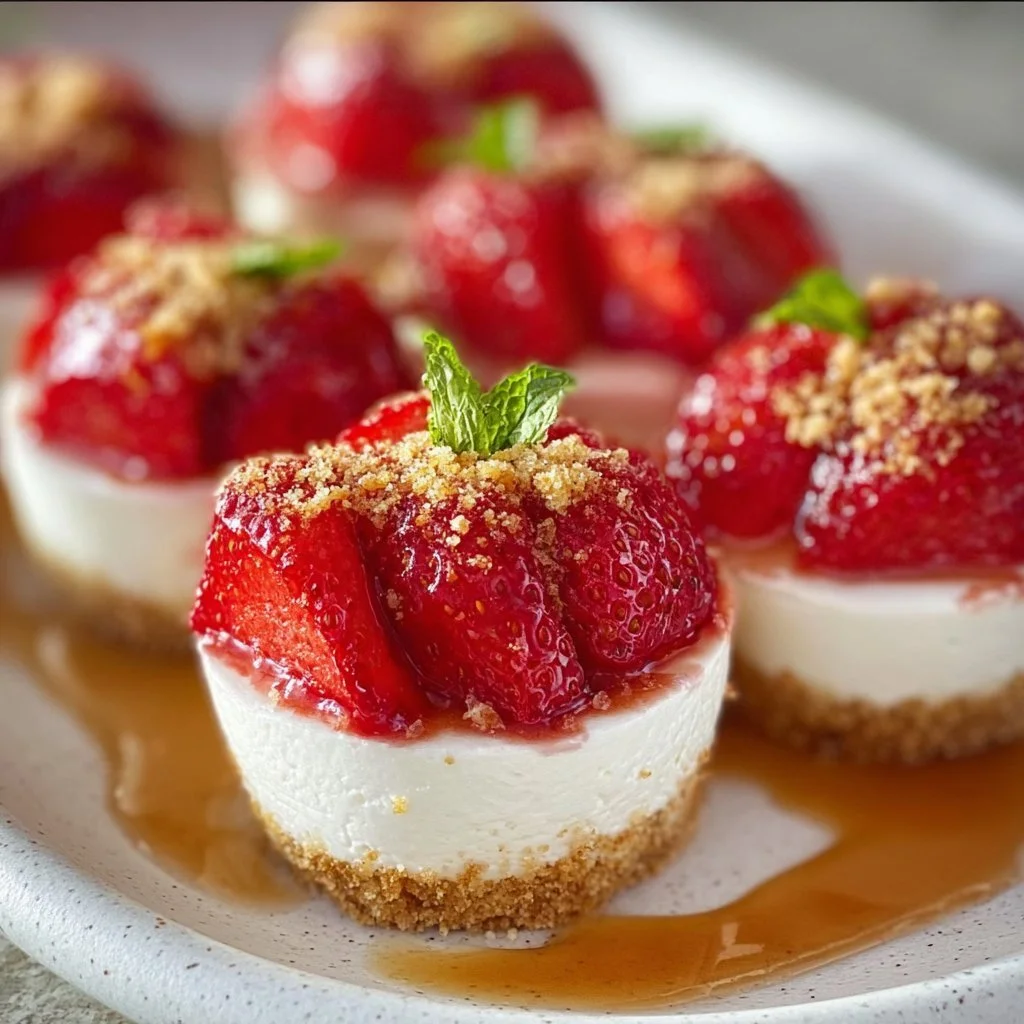
How to Serve Cheesecake Deviled Strawberries
Present these beauties on a colorful platter surrounded by mint leaves for a pop of green. You can also drizzle some chocolate sauce on top for an elegant finish. Imagine the bright red strawberries contrasted against creamy filling and crunch from the graham cracker — pure magic! Everyone will rave about the fun textures and mouthwatering flavors.
How to Store Cheesecake Deviled Strawberries
These delightful bites last in the fridge for about 2 days covered. Just remember, they’re best enjoyed fresh! For make-ahead fun, you can prepare the filling a day in advance and whip up your strawberries just before the big event. 🍽️
Tips to Make Cheesecake Deviled Strawberries
- Make sure your cream cheese is room temperature for easy mixing.
- If you’re short on time, consider using store-bought whipped cream instead.
- Feel free to use smaller strawberries for bite-sized treats.
- For an extra twist, add a tablespoon of lemon zest to the filling for zesty freshness!
Variation
Want to mix it up? Try substituting the graham crackers with crushed Oreos for a cookies-and-cream vibe! For a vegan option, swap the cream cheese with a plant-based alternative and use coconut cream instead of heavy whipping cream. Easy peasy!
FAQs
Can I use frozen strawberries?
Frozen strawberries won’t hold up as well for this recipe, but fresh ones are the way to go for that perfect crunch!
How can I make these ahead of time?
Prepare the filling and strawberries separately, then assemble them just before serving for the best taste!
What if I have leftovers?
These tasty treats are best eaten fresh, but if you have some left, keep them in an airtight container in the fridge for up to 2 days.
📌 Pin this recipe for your next cozy dinner night!
Cheesecake Deviled Strawberries
Ingredients
Method
- Slice each strawberry lengthwise, keeping the stems intact. Cut a tiny slice off the bottom of each half for stability and hollow out the center.
- Whip the cold heavy cream until stiff peaks form. In a separate bowl, beat the cream cheese, powdered sugar, and vanilla until smooth, then fold in the whipped cream.
- Fill a piping bag with the cheesecake filling and pipe generously into each strawberry half.
- Sprinkle graham cracker crumbs over each filled strawberry for that authentic cheesecake touch.
- Refrigerate for at least 1 hour to let the flavors meld and serve chilled.
Notes
Printable Recipe Card
Want just the essential recipe details without scrolling through the article? Get our printable recipe card with just the ingredients and instructions.