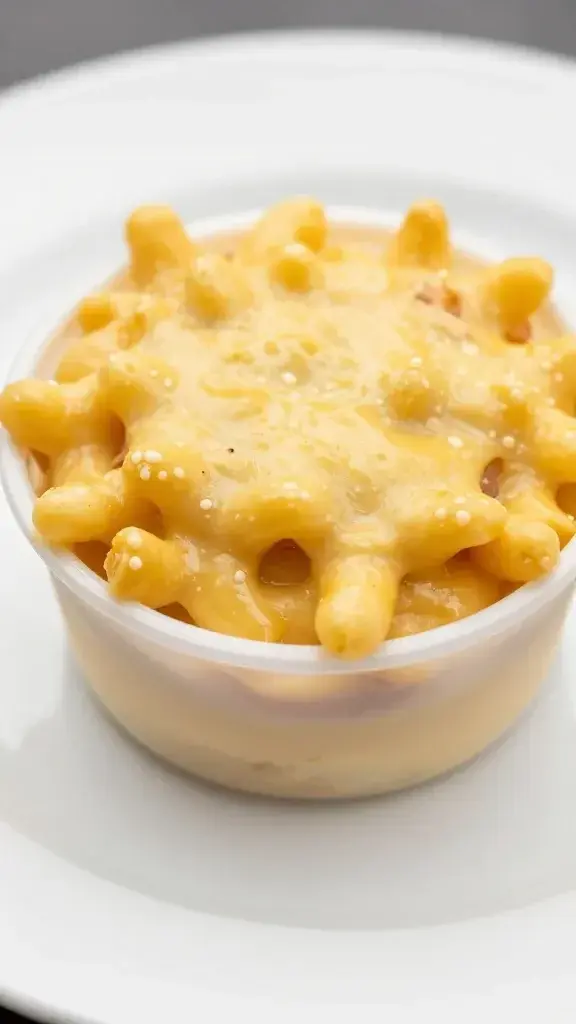
Baked Mac and Cheese Cups: Crispy, Gooey Perfection
Welcome to the tiny, cheesy miracle that is baked mac and cheese cups. They’re basically comfort in a handheld form—creamy, cozy, and a little fancy for a party or lunchbox. If you’ve ever wanted mac and cheese that stays cute while you eat it with your fingers, you’re in the right kitchen.
What makes these cups so crave-worthy?
First off, they’re the love child of creamy mac and cheese and a bite-sized cup. The result: crispy exteriors, gooey centers, and zero gravity-free cheesy spills. FYI, you don’t need fancy gadgets to pull this off; minimal ingredients and a standard muffin tin do the trick. They’re perfect for feeding a crowd, meal-prepping lunches, or just impressing your in-laws without saying a word.
A simple, flexible base you can customize
The beauty of baked mac and cheese cups is how forgiving they are. You won’t scare away your taste buds by sticking to a strict recipe. Think of this as your mac and cheese canvas.
- Pasta: Elbow macaroni is classic, but shells or small penne work beautifully too. Aim for al dente so they don’t turn mushy in the oven.
- Cheese: A mix is best. Cheddar for sharpness, mozzarella for stretch, and a splash of parmesan for that salty tang. Want more bite? Add Gruyère or fontina.
- Creaminess: Milk, cream, or a blend keeps things silky. If you’re short on time, Greek yogurt or sour cream adds tang and richness.
- Seasoning: Salt, pepper, a pinch of paprika or mustard powder, and a little garlic powder wake everything up.
Step-by-step: how to assemble without bombing your bake
Let’s break down the quick, low-stress process.
- Cook pasta until just shy of al dente. It will finish in the oven, so you don’t want it to be mushy.
- Make a simple roux or just melt butter, whisk in flour, then pour in milk for a smooth bechamel. Stir until thick enough to coat a spoon.
- Stir in the cheese slowly. Low heat, steady groove—don’t scorch the cheese or you’ll get a grainy texture.
- Combine pasta with the cheesy sauce. If it looks dry, splash in a little milk until it’s glossy and saucy.
- Scoop into a greased muffin tin. Don’t overfill; you want a nice cup with a top edge for that crispy top.
- Top with a little extra cheese or breadcrumbs for crunch. Bake until golden and bubbly.
Texture contrasts: why the crust is everything
If the cups come out soft all over, you’re missing the magic. The goal is a crisp, golden edge and a creamy center. The trick is a quick bake at a higher temperature to set the outer layer, then a lighter finish to keep the inside ooey-gooey.
– For extra crunch, toss breadcrumbs or crushed crackers with a kiss of melted butter and sprinkle on top before baking.
– Want a vegetarian-friendly option with a little bite? Mix in sautéed onions, garlic, or finely chopped jalapeños into the filling.
Flavor boosters: mix-ins that actually work
These cups love personality. Don’t be afraid to riff.
Herb and spice trio
– Fresh chives or parsley for brightness
– A pinch of smoked paprika for a subtle kiss of smoke
– Dijon mustard for a tangy undertone
Texture and crunch
– Crispy prosciutto bits for a meaty pop
– Toasted breadcrumbs with grated parmesan
– Nuts, like chopped almonds or pecans, for an unexpected crunch (goes surprisingly well with dairy richness)
Make-ahead magic and storage tips

Yes, you can plan these in advance. They’re perfect for batch cooking.
- Make ahead: Assemble the cups, cover, and refrigerate up to 24 hours before baking. You’ll just bake a few minutes longer than the recipe says from chilled.
- Freeze: Fully cooked cups freeze well. Reheat from frozen in a 350°F (175°C) oven until hot and the tops crisp up again.
- Lunchbox-ready: These are kids’ and adults’ favorites. Pack with a side of veggie sticks and a fruit cup for a surprisingly complete meal.
Tips to avoid the soggy, sad cups
Let’s spare you from sad cups and wasted cheese.
– Don’t skip the pre-bake chill. A short rest in the fridge helps the filling set, so it doesn’t spill when you lift them out.
– Use the right pan: a metal muffin tin heats evenly and helps a crisp crust. Silicone sometimes traps steam, keeping things softer.
– Drain pasta well. Extra moisture means extra sog. Dry pasta absorbs less sauce in the bake.
Flavor safety nets: staying balanced
If your first run tastes a little flat, it’s easy to fix on the fly.
– Add a splash of hot sauce or a teaspoon of mustard for a quick zing.
– A handful of shredded sharp cheese on top during the last few minutes of bake intensifies the cheesy crust.
– A little nutmeg in the béchamel might sound odd, but it rounds out dairy and cheese beautifully.
Serving ideas: when to pull these out of the oven
These cups aren’t just a side dish; they’re a star.
– For game night or a party, serve with a bright green salad and a tangy tomato-yogurt dip.
– At a casual dinner, pair with roasted veggies or a simple grilled chicken breast.
– As a snackable party bite, set out toothpicks and a few dipping sauces (barbecue, ranch, or spicy mayo).
FAQ
Can I use gluten-free pasta?
Yes. Gluten-free pasta behaves a bit differently, so keep an eye on texture. Cook it to al dente, and consider a little extra cheese or a splash of milk if it seems dry.
What if I don’t have a muffin tin?
You can bake this as a casserole instead. Just bake in a greased baking dish, then scoop into “cups” after baking by using a small biscuit cutter or a spoonful-sized scoops for serving.
How long do these cups stay good?
Refrigerated, they’ll stay fresh for up to 4 days. Freeze for longer storage. Reheat in the oven to restore crispiness.
Can I make them dairy-free?
Absolutely. Use dairy-free butter and a blend of plant-based milks. Choose a dairy-free cheese that melts well, and consider adding a splash of nutritional yeast for cheesy flavor.
What’s the best cheese blend for flavor?
A classic blend is sharp cheddar for bite, mozzarella for melt, and parmesan for depth. If you want more sophistication, add Gruyère or fontina. FYI, taste as you go to avoid overdoing one cheese.
Conclusion
Baked mac and cheese cups are the little miracles that happen when comfort food gets miniaturized and upgraded. They’re forgiving, flexible, and seriously tasty. So grab a muffin tin, stock up the dairy brigade, and start baking. You’ll get crispy edges, creamy centers, and a tray that disappears faster than you can say “pass the cheese.” If you’re feeling extra bold, invite friends over and let them assemble their own flavor profiles—because nothing bonds people like molten cheese and a friendly bake-off.