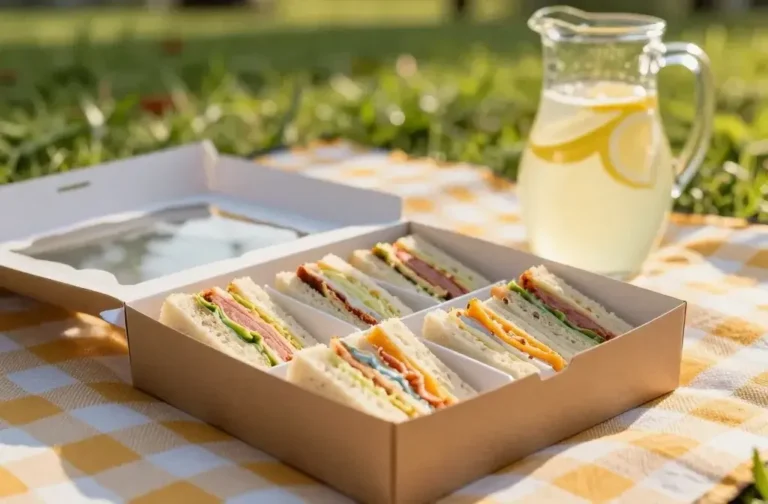
Mini Sandwich Picnic Platter: Tiny Bites, Big Flavor
The idea of a mini sandwich picnic platter is simple: tiny bites, big flavor, zero fuss. You get a spread that feels fancy but is actually doable on a Tuesday afternoon. It’s basically adult lunchables—minus the regret and plus the potential for a sun hat and a blanket.
What makes a mini sandwich platter so appealing?
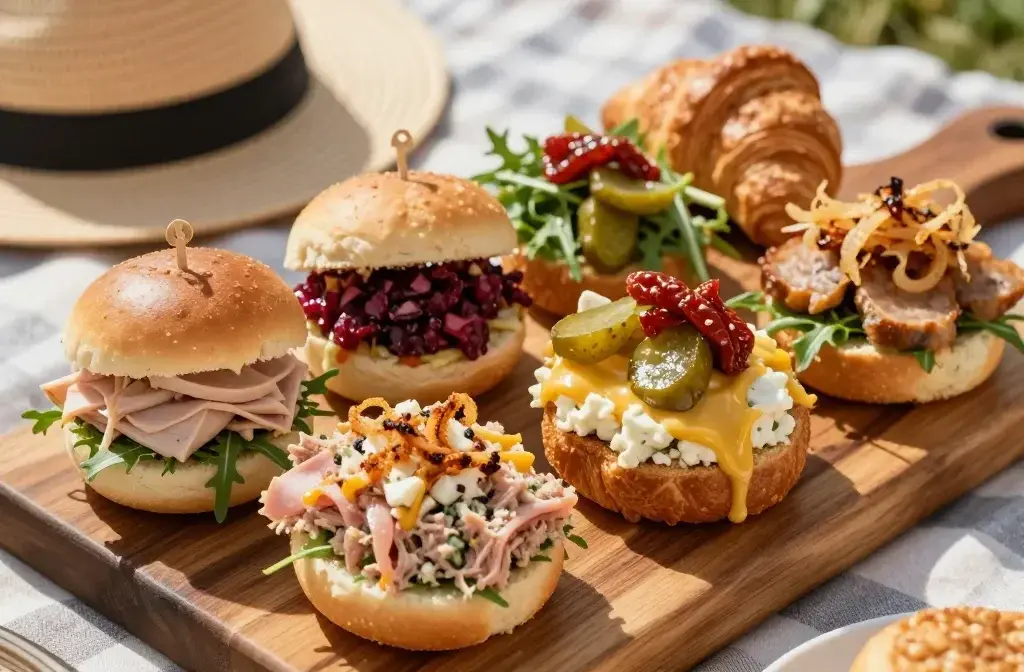
Tiny sandwiches are cute, portable, and wildly adaptable. You can cater to different diets without a meltdown at the deli counter. Think bite-sized textures, punchy fillings, and a mix of crunchy, creamy, and tangy. FYI, variety is the secret sauce here.
Building blocks: choosing the bread and fillings
Your bread sets the tone. Go for soft white or whole-grain sliders, baguette rounds, or mini croissants. The goal is bite-sized and sturdy enough to hold a smear without turning into mush.
- Proteins: turkey + cranberry, ham + honey mustard, tuna salad, roasted veggie with feta.
- Cheeses: cream cheese, goat cheese, cheddar, brie—pick one spreadable option per tray for easy layering.
- Condiments: mayo, aioli, pesto, tapenade, and just a dab of mustard to avoid sog.
- Extras: pickles, jalapeños, arugula, sun-dried tomatoes, crispy onions for texture.
Flavor profiles to mix and match
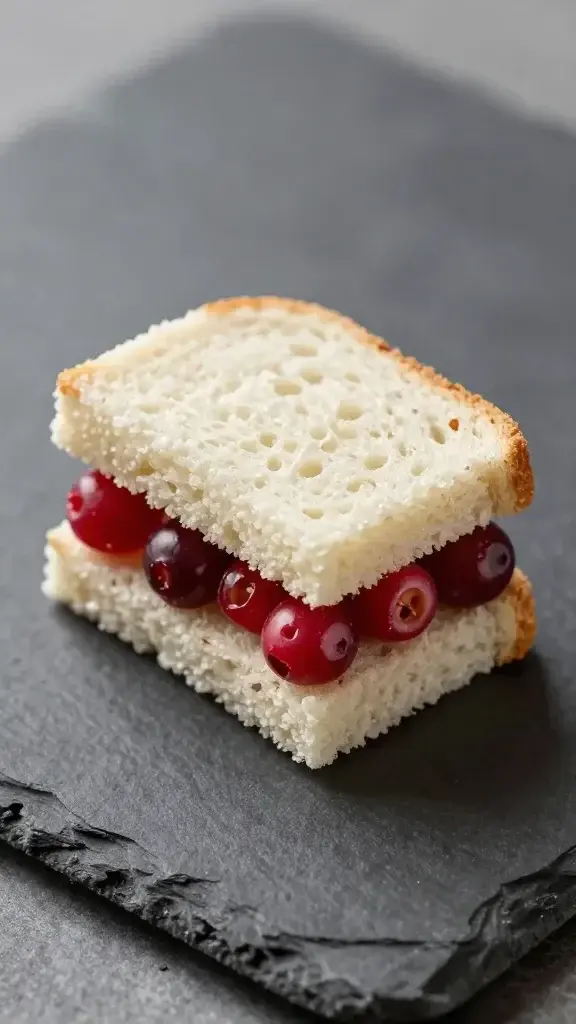
– Classic and crowd-pleasing: turkey with cranberry mayo and Swiss on a brioche round.
– Bold and zippy: salami with pepper relish and provolone on a mini baguette.
– Fresh and veggie-forward: cucumber, herby cream cheese, and sprouts on rye rounds.
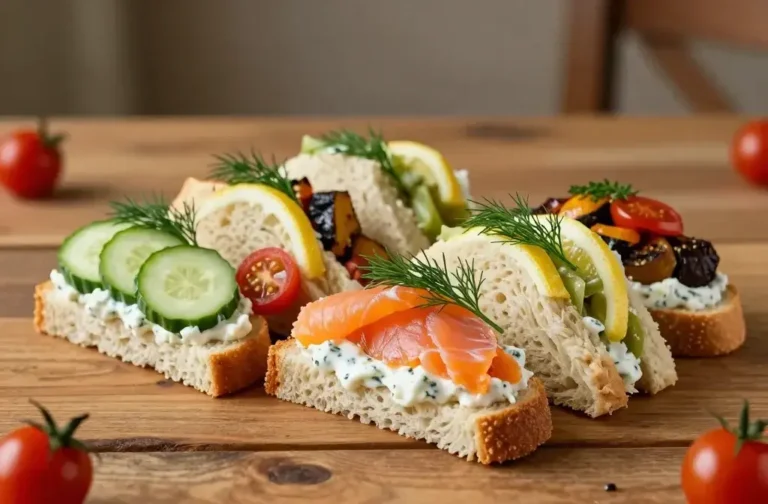
– Luxe bite: smoked salmon, dill cream cheese, and capers on mini bagels.
Prep tips so you don’t cry into the picnic cooler
The key is smart prep. You want quick assembly, not a full-blown kitchen marathon.
- Pre-slice everything the night before. Keeps the vibe relaxed and speeds things up on the big day.
- Assemble close to serving to prevent soggy bread. Layer under spreads, not over saucy fillings.
- Dry is your friend—pat veggies dry, avoid watery fillings, and use crackers or crispbread as needed.
- Portable kit with mini tongs, toothpicks, and a damp cloth for quick wipe-downs.
Seasonal twists you’ll want to try
– Spring: herb goat cheese, asparagus tips, and prosciutto on focaccia rounds.
– Summer: tomato-basil cream cheese, sliced peach, and burrata on ciabatta minis.
– Fall: roasted squash, sage, and fontina on olive bread.
– Winter: pear, brie, and arugula on baguette guests love.
Texture matters: crunch, cream, and bite
A good mini platter isn’t just about flavor. It plays with textures.
- Crunch: cucumber coins, pretzel crisps, roasted chickpeas, or crushed nuts as a topping
- Cream: whipped cream cheese, cultured butter, or a soft cheese spread
- Soft center: tender meats, mellow cheeses, or a mushroom duxelle for jazz
How to layer for maximum texture
Spread a thin, flavorful base, add a crunchy element, then finish with something creamy. If you can see the bread through the sandwich, you probably did it right.
Presentation: plate it like it’s a party
Presentation signals flavor before the first bite. You want color, space, and a little whimsy.
- Color blocks: group greens with bright fillings to pop visually.
- Sauce dips: tiny bowls of honey mustard, herbed aioli, or olive tapenade in reach.
- Garnishes: lemon wedges, dill sprigs, or edible flowers if you’re fancy (or just want the photos).
DIY mini boards
– Use a long wooden board for a rustic look, or a slate platter for a modern vibe.
– Create three zones: protein-forward, veggie-forward, and cheese-forward.
– Keep toothpicks handy so guests can mix and match without forks.
Diet-friendly and inclusive options

A true mini sandwich platter welcomes everyone.
- Gluten-free: use small, sturdy gluten-free rolls or crispbread with the fillings on the side.
- Vegetarian: roasted pepper and hummus on rye, caprese bites, cucumber and herb cream cheese.
- Lower-carb: rely on open-face bites with extra toppings and skip the top bread slice.
Allergies and substitutions
Always label fillings if you’ve got nut, dairy, or sesame risks. Offer a couple of clearly marked options so no one feels left out.
Make-it-ahead vs last-minute assembly
Flexibility is the name of the game with picnics.
– Make-ahead: spreads, boiled fillings, and cut veggies can be prepped a day or two in advance.
– Last-minute: bread toasting, cheese slicing, and final assembly right before serving keeps everything fresh.
Timeline cheat sheet
1) Day before: prep fillings, wash greens, and portion condiments.
2) Morning of: slice bread, pre-assemble easy combos, and pre-cut fruit if using.
3) 30 minutes before: lay everything out, finish with delicate toppings, and grab your napkins.
FAQ
Can I make this platter vegan?
Yes. Use plant-based cheeses, hummus or roasted red pepper spreads, avocado, cucumber, tomato, and marinated artichokes. Think flavors that sing without animal products.
What’s the best bread for staying sturdy?
Slightly denser breads work better: mini baguettes, crostini, or sturdy sliders. Avoid super fluffy loaves that crumble under sauce or heavy fillings.
How many bites should each person have?
Aim for 3–5 bites per person, depending on total guests and other dishes. It’s about balance—enough variety without turning the platter into a black hole of sandwich halves.
Any tips to prevent soggy sandwiches?
Spread with thin layers of sauce and put fillings that release moisture on the bottom. Layer with crisp veggies or lettuce to act as a barrier. Assemble closer to serving time when possible.
What dips pair well with mini sandwiches?
Herbed mayo, light ranch-style dip, olive tapenade, and balsamic glaze all pair nicely. Keep dips in small bowls to avoid drips on the bread.
Conclusion
A mini sandwich picnic platter is the edible equivalent of a good playlist: it has variety, it’s easy to customize, and it makes a casual moment feel special. You can bring together simple ingredients and turn them into a day-ruiningly tasty spread with little stress. So grab a blanket, pick a vibe, and start stacking those bite-sized wonders. IMO, you’ll be shocked at how quickly this becomes the star of your outdoor hangs.